

With the help of Terraform workspaces, multiple environments such as dev or staging can be managed using the same Terraform configuration files. Each of these environments has an isolated and independent state file.
In this blog post, we will explain Terraform workspace, its use cases, and some practical examples. Additionally, we will understand how to manage infrastructure using various Terraform workspace commands, best practices, and much more.
Disclaimer: All use cases of Terraform workspaces discussed here work similarly in OpenTofu, the open-source Terraform alternative. However, to keep it simple and familiar for DevOps engineers, we will use “Terraform workspace” as a catch-all term throughout this blog post.
What is Terraform Workspace?
Terraform workspace allows you to create multiple, separate environments or versions of your infrastructure in the same Terraform configuration.
The separate state file for each of the environments (i.e., workspaces) helps you manage multiple instances of your infrastructure without interfering with each other. Each of the Terraform deployments in a workspace is linked with its own state file and updated with the desired configuration.
In a nutshell, workspaces enable you to deploy and manage different environments that have an identical Terraform configuration, each with a separate state file. It has less overhead since you use the Terraform configuration without duplicating code.
Like Terraform workspaces, Terraform folders maintain separate state files for each folder or environment. However, folders are useful in scenarios where multiple environments differ from each other in their infrastructure setup and have much more complex configurations.
Remember: unless you select a workspace, all your changes and Terraform deployments are done in the default workspace.
Terraform Workspace Commands
To understand how you can manage your infrastructure using a workspace, you need to know the Terraform workspace commands and what they do. Let’s take a look at these commands.
Create Workspace
This command creates a new workspace with a specified name. You could have multiple workspaces that can also be referred to as separate environments. For example, the command to create an environment closer to the development stage, named ‘dev’, looks like this:
terraform workspace new dev
List Workspaces
You can easily fetch your current and existing workspaces. In the command output, the current workspace has an asterisk (*) associated with it. If you do not create a new workspace, you will see the default workspace as your current one:
terraform workspace list
List Workspaces in JSON Format
If you need to pass and use your workspaces in your automation or scripts, simply add ‘-jason’ flag, like so:
terraform workspace list -json
Select Workspace
You can easily switch between workspaces using the Terraform [.code]workspace select [.code] command. Once you have switched, your current active workspace changes. Let’s select a workspace named ‘dev’:
terraform workspace select dev
Show Workspace
This displays the current active workspace. Using this command, you can easily figure out which workspace you are in before making any changes, and it looks like this:
terraform workspace show
Delete Workspace
In Terraform, you can clean up workspaces that are no longer required. Delete a workspace named ‘dev’, like so:
terraform workspace delete dev
When to use Terraform Workspace
Terraform workspaces enable you to manage multiple environments or regions, isolate your state configuration, and much more. Let’s explore them:
- Managing multiple environments: Using workspaces, you can easily manage multiple environments such as testing or production. These environments have the same Terraform configuration and are independent of each other. Note that workspaces are a good approach when you have a duplicate Terraform configuration for different environments. Otherwise, folders are better for complex and different configurations across environments.
- Isolation of Terraform state: You can control access to multiple teams or projects using the same Terraform code by isolating the Terraform state. Terraform workspaces allow you to manage these individual states without any conflict.
- Managing multiple regions: Terraform workspace serves your use case if you need to manage your infrastructure across multiple geographic regions. This helps you deploy and manage your Terraform configuration without duplicating your code.
- Testing new features: If you need to test out a new feature or configuration change, use a new Terraform workspace. This way, you’d have a test environment identical to your production environment. Also, you would not be affecting your current environments, such as production, thereby avoiding incidents or downtimes.
How to use Terraform Workspace Commands
By now, we have looked at the Terraform workspace commands and use cases. Let’s understand them better with implementation.
Manage Multiple Environments Using Workspace and Variables
In this example, we’ll use Terraform workspaces to deploy and manage multiple environments, where each uses the same Terraform configuration. With workspaces, you can use the ‘terraform.workspace’ interpolation sequence anywhere interpolations are allowed and correspond to your current workspace.
First, define your Terraform code to deploy an S3 bucket.
provider "aws" {
  region = "eu-central-1"
}
resource "aws_s3_bucket" "example" {
  bucket = "env0-s3-bucket"
}
Now, if you want to verify your current workspace, run [.code]terraform workspace show[.code].
➜  env0 git:(main) ✗ terraform workspace show
default
To uniquely identify the buckets in each environment, you can name and tag your S3 buckets with the ‘terraform.workspace’ interpolation in your code:
resource "aws_s3_bucket" "env0" {
  bucket = "${terraform.workspace}-bucket-01"
  tags = {
    Environment = terraform.workspace
  }
}
Before any changes, initialize your Terraform code:
➜  env0 git:(main) ✗ terraform init
Initializing the backend...
Initializing provider plugins...
- Finding latest version of hashicorp/aws...
- Installing hashicorp/aws v5.68.0...
- Installed hashicorp/aws v5.68.0 (signed by HashiCorp)
…
Next, create new workspaces named ‘dev’ and ‘staging’ in which to deploy your [.code]aws_s3_bucket[.code]:
 ➜  env0 git:(main) ✗ terraform workspace new dev
Created and switched to workspace "dev"!
You're now on a new, empty workspace. Workspaces isolate their state, so if you run [.code]terraform plan[.code], Terraform will not see any existing state for this configuration.
➜  env0 git:(main) ✗ terraform workspace new staging
Created and switched to workspace "staging"!
…
Here, in the ‘staging’ workspace, deploy the S3 bucket to the ‘staging’ environment:
➜  env0 git:(main) ✗ terraform apply --auto-approve
…
Terraform will perform the following actions:
  # aws_s3_bucket.env0 will be created
  + resource "aws_s3_bucket" "env0" {
      + bucket                      = "env0-staging-bucket"
      + tags                        = {
          + "Environment" = "staging"
        }
…
Plan: 1 to add, 0 to change, 0 to destroy.
aws_s3_bucket.env0: Creating...
aws_s3_bucket.env0: Creation complete after 5s [id=env0-staging-bucket]
Apply complete! Resources: 1 added, 0 changed, 0 destroyed.
Run the [.code]terraform show[.code] command to see your state file in the ‘staging’ workspace containing the S3 bucket configuration:
➜  env0 git:(main) ✗ terraform show
# aws_s3_bucket.env0:
resource "aws_s3_bucket" "env0" {
    arn                         = "arn:aws:s3:::env0-staging-bucket"
    bucket                      = "env0-staging-bucket"
   …
    tags                        = {
        "Environment" = "staging"
    }
}
Using this same Terraform configuration, switch to the ‘dev’ workspace and apply the S3 config:
➜  env0 git:(main) ✗ terraform workspace select dev
Switched to workspace "dev".
➜  env0 git:(main) ✗ terraform apply --auto-approve
…
Terraform will perform the following actions:
  # aws_s3_bucket.env0 will be created
  + resource "aws_s3_bucket" "env0" {
      + bucket                      = "env0-dev-bucket"
      + tags                        = {
          + "Environment" = "dev"
        }
…
Plan: 1 to add, 0 to change, 0 to destroy.
aws_s3_bucket.env0: Creating...
aws_s3_bucket.env0: Creation complete after 5s [id=env0-dev-bucket]
Apply complete! Resources: 1 added, 0 changed, 0 destroyed.
Here, you can see that the S3 bucket in the ‘dev’ workspace is deployed to the ‘dev’ environment. To verify if this is isolated from the ‘staging’ workspace, let’s look at the state file in the ‘dev’ workspace:
➜  env0 git:(main) ✗ terraform show
# aws_s3_bucket.env0:
resource "aws_s3_bucket" "env0" {
    bucket                      = "env0-dev-bucket"
    tags                        = {
        "Environment" = "dev"
    }
…
As you can see, this state file only contains the S3 resource from the ‘dev’ environment. Now, you know how to use Terraform workspaces to manage different environments with isolated state files.
Using a Remote Backend With Terraform Workspace
Now, still using the above example, you can have a remote backend to store your state file for your ‘dev’ and ‘staging’ workspaces.
Here, the remote backend stores the state file for each of the environments separately. For this, define a remote state backend that will store the state file for all your workspaces:
terraform {
  backend "s3" {
    bucket = "env0-state-bucket"
    key    = "workspace/backend/terraform.tfstate"
    region = "eu-central-1"
    workspace_key_prefix = "terraform-state-1"
  }
}
Once your state files are moved to the S3 bucket, you can verify the structure of your remote backend and understand how it maintains a separate state file for each workspace using the AWS console.

The [.code]terraform state pull[.code] command will now retrieve the state file from the remote backend of the currently active workspace or environment. In this scenario, the current workspace is ‘dev’:
➜  env0 git:(main) ✗ terrterraform state pull
{
…
  "resources": [
    {
      "mode": "managed",
      "type": "aws_s3_bucket",
      "name": "env0",
      "provider": "provider[\"registry.terraform.io/hashicorp/aws\"]",
      "instances": [
        {
            "bucket": "env0-dev-bucket",
…
(base) ➜  env0 git:(main) ✗ terraform workspace select staging
Switched to workspace "staging".
(base) ➜  env0 git:(main) ✗ terraform state pull
{
…
  "resources": [
    {
      "mode": "managed",
      "type": "aws_s3_bucket",
      "name": "env0",
      "provider": "provider[\"registry.terraform.io/hashicorp/aws\"]",
      "instances": [
        {
            "bucket": "env0-staging-bucket",
…
You can display all the workspaces and remove unused ones, like so:
➜  env0 git:(main) ✗ terraform workspace list
  default
  dev
 * staging
➜  env0 git:(main) ✗ terraform workspace delete dev
Deleted workspace "dev"!
Remember: you cannot delete a workspace if it is not empty or if it is the current active workspace.
With the use of a remote backend, the state files are stored centrally, and there’s only one source of truth. Multiple team members can collaborate without any conflicts or overwriting the state files for the workspaces.
Reusable Modules and Terraform Workspace
Modules are used to deploy the repetitive code blocks in your Terraform configuration. Let’s see how you can use them with the space to deploy VPC in different environments or workspaces.
First, define the networking module in the Networking directory with variables and outputs for the arguments:
resource "aws_vpc" "this" {
  cidr_block = var.vpc_cidr
  tags = {
    Name = var.name
  }
}
resource "aws_subnet" "this" {
  count = length(var.subnet_cidrs)
  vpc_id = aws_vpc.this.id
  cidr_block = var.subnet_cidrs[count.index]
  tags = {
    Name = "${var.name}-subnet-${count.index}"
  }
}
variable "name" {
  description = "Name of the VPC"
  type        = string
}
variable "vpc_cidr" {
  description = "CIDR block for the VPC"
  type        = string
}
variable "subnet_cidrs" {
  description = "List of subnet CIDR blocks"
  type        = list(string)
}
output "vpc_id" {
  value = aws_vpc.this.id
}
Now, refer to the module and variables in your main.tf file:
provider "aws" {
  region = "eu-central-1"
}
module "network" {
  source      = "./modules/network"
  name        = terraform.workspace
  vpc_cidr    = var.vpc_cidr
  subnet_cidrs = var.subnet_cidrs
}
variable "vpc_cidr" {
  description = "CIDR block for the VPC"
  type        = string
}
variable "subnet_cidrs" {
  description = "List of subnet CIDR blocks"
  type        = list(string)
}
You can define the input variables for your networking configuration using .tfvars files, such as dev.tfvars and staging.tfvars for each environment or workspace:
#staging.tfvars
vpc_cidr    = "10.1.0.0/16"
subnet_cidrs = ["10.1.1.0/24", "10.1.2.0/24"]
#dev.tfvars
vpc_cidr    = "10.0.0.0/16"
subnet_cidrs = ["10.0.1.0/24", "10.0.2.0/24"]
Now, initialize the backend for your Terraform configuration, create a new workspace named ‘dev’, and apply your infrastructure changes:
➜  env0 git:(main) ✗ terraform init
Initializing the backend...
Initializing modules...
Initializing provider plugins...
…
 ➜  env0 git:(main) ✗ terraform workspace new dev
Created and switched to workspace "dev"!
 ➜  env0 git:(main) ✗ terraform apply --var-file=dev.tfvars --auto-approve
aws_s3_bucket.env0: Refreshing state... [id=env0-dev-bucket]
…
Terraform will perform the following actions:
  # module.network.aws_subnet.this[0] will be created
  + resource "aws_subnet" "this" {
          + "Name" = "dev-subnet-0"
        }
…
  # module.network.aws_subnet.this[1] will be created
  + resource "aws_subnet" "this" {
          + "Name" = "dev-subnet-1"
        }
…
  # module.network.aws_vpc.this will be created
  + resource "aws_vpc" "this" {
          + "Name" = "dev"
        }
…
Apply complete! Resources: 3 added, 0 changed, 0 destroyed.
Similarly, you can create a ‘staging’ namespace and deploy the network module. Once done, you can view the ‘dev’ and ‘staging’ VPCs via the AWS console.
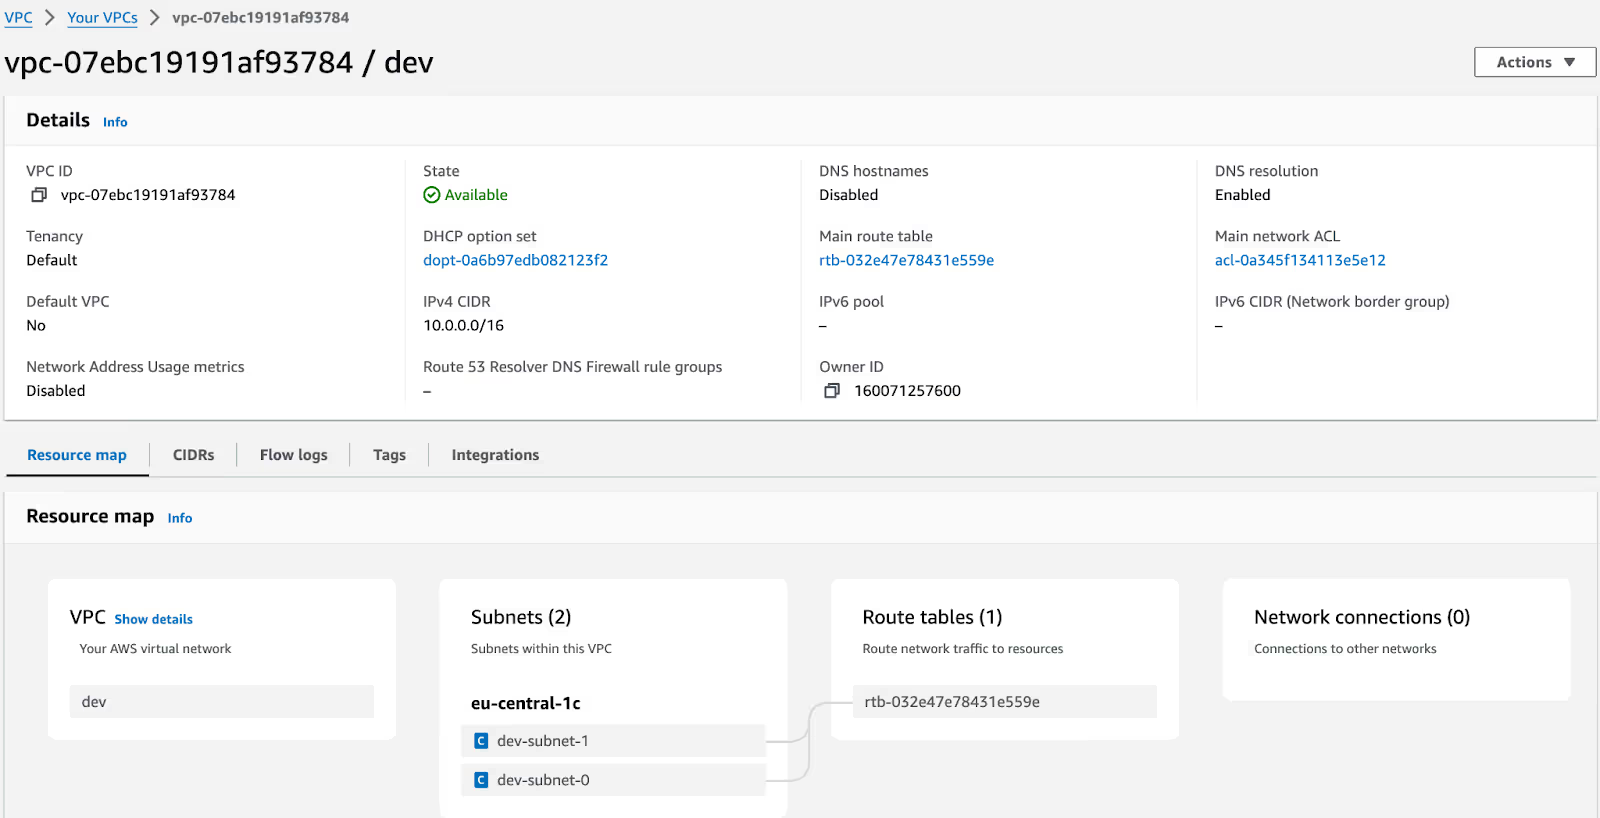
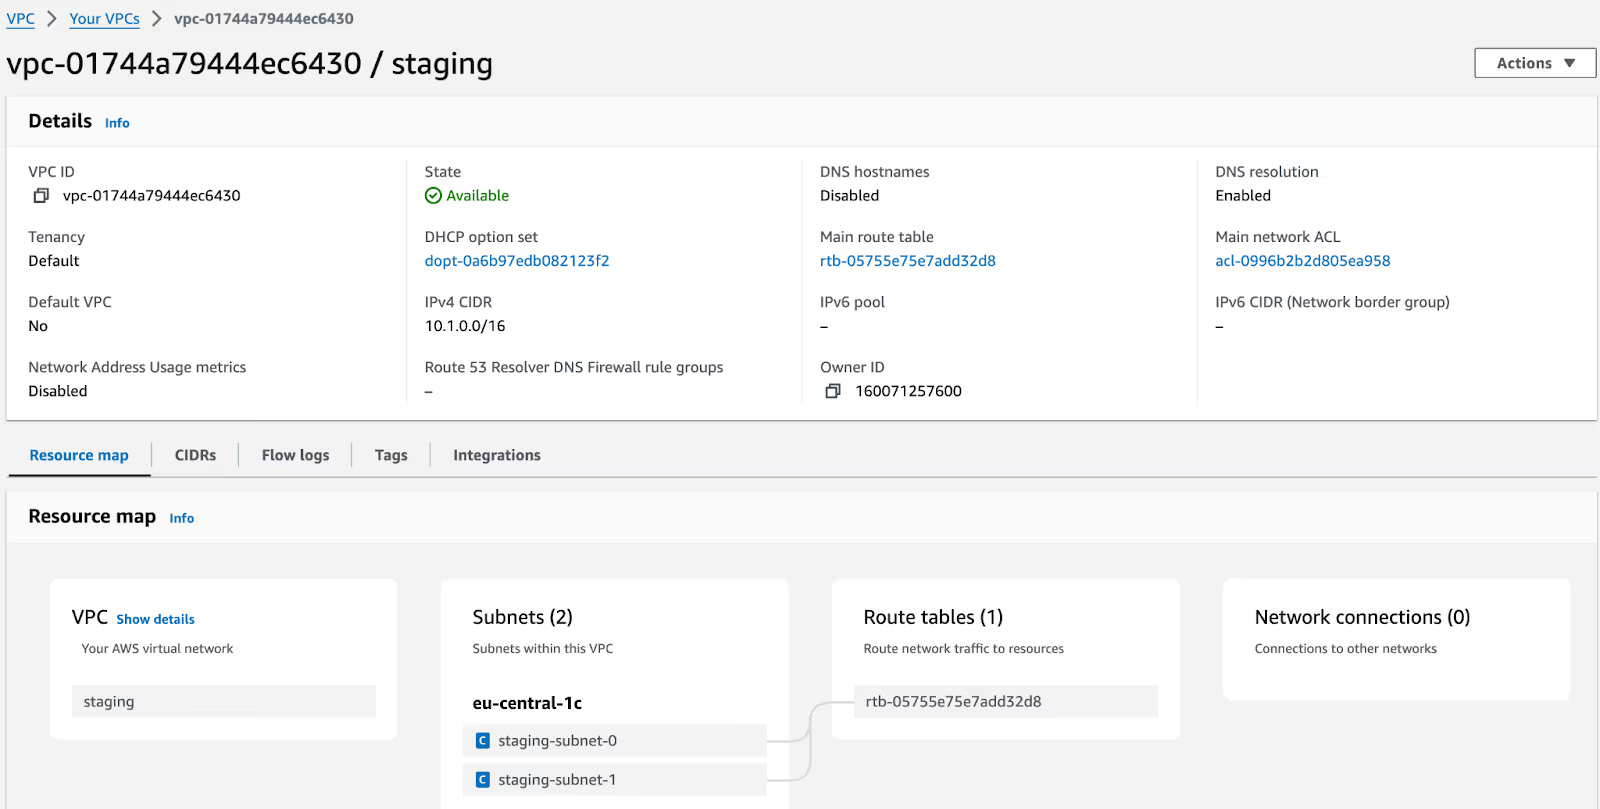
As you can see, modules behave similarly to all the other Terraform configurations in each workspace and help you save time.
Note that your configuration state might differ in each workspace, and when you switch to another workspace and run apply, it will deploy the same changes in that workspace since the Terraform code is common for all the workspaces.
Terraform Workspace Best Practices
In the above examples, we learned when to use the Terraform workspaces. Now, let’s quickly go over some of the best practices that you should follow:
- Ensure that you use the workspaces when they are identical or if there is a small infrastructure configuration difference between the environments. If there is a significant difference between your testing and production environment, use Terraform folders.
- Use workspace commands such as [.code]terraform workspace show[.code] or [.code]terraform workspace select[.code] in your CI/CD workflows. It helps avoid misconfigurations and deployment errors in your workspaces or environments by being aware of the active workspace.
- Don’t hardcode workspace-specific variables such as instance configurations in your Terraform code. Instead, store them in a .tfvars file or environment variables.
- When multiple team members are working on the same workspace, use state-locking mechanisms on remote state files to prevent state corruption and conflicts by ensuring that only one team member makes changes at a time.
Terraform Workspace and env0
When working with Terraform, managing multiple environments or workspaces within your infrastructure helps by easily replicating environments with an isolated state for each one of them. Since the same code is used across different workspaces, you can switch between these workspaces to apply changes to different environments.
Similarly, env0 allows developers to create and manage multiple environments directly from their UI under the same project. Each environment created in env0 is equivalent to a Terraform workspace, providing the flexibility to reuse the same Terraform code across different environments without manual intervention, such as using CLI.
You can create new environments in env0 using templates, making it easy to replicate infrastructure across multiple environments (like workspaces in Terraform) by following these steps:
- Access the project: Go to your project on env0's dashboard.
- Create a new environment: Click the ‘+ Create New Environment’ button at the top right.

- Choose the setup method: Select either ‘Template’ or ‘VCS’ as your environment creation method. Templates allow you to create different environments while using the same underlying codebase, much like switching between workspaces in Terraform.
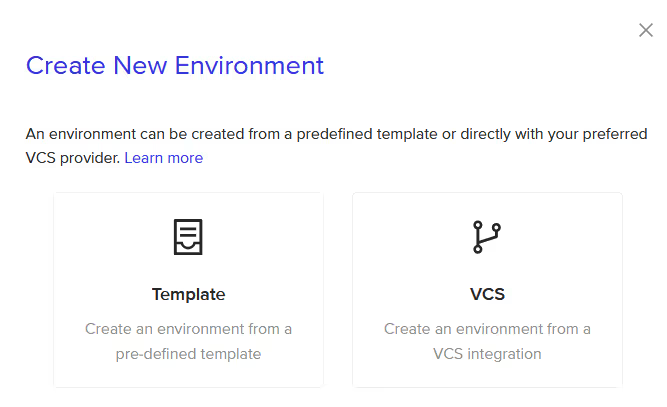
- Select template: Choose Template as your environment creation method. Here, we already have a pre-created template for an S3 bucket.

- Run the template: After choosing the template, click the ‘Run Now’ button to start the setup.

- Choose environment and workspace names: You will be prompted to provide an environment name and, optionally, a workspace name. If you don’t specify a workspace name, env0 will assign one by default. Once the details are provided, click ‘Run’ to deploy your environment.
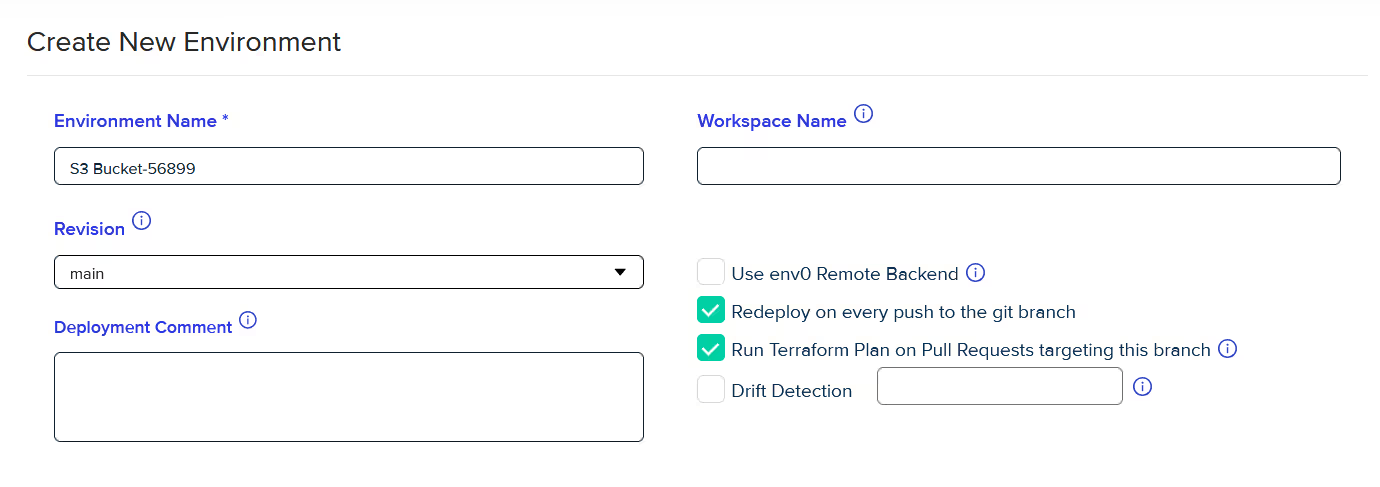
- Review deployment logs: After creation, the environment details and deployment logs will be available to track the progress of your deployments, like so:
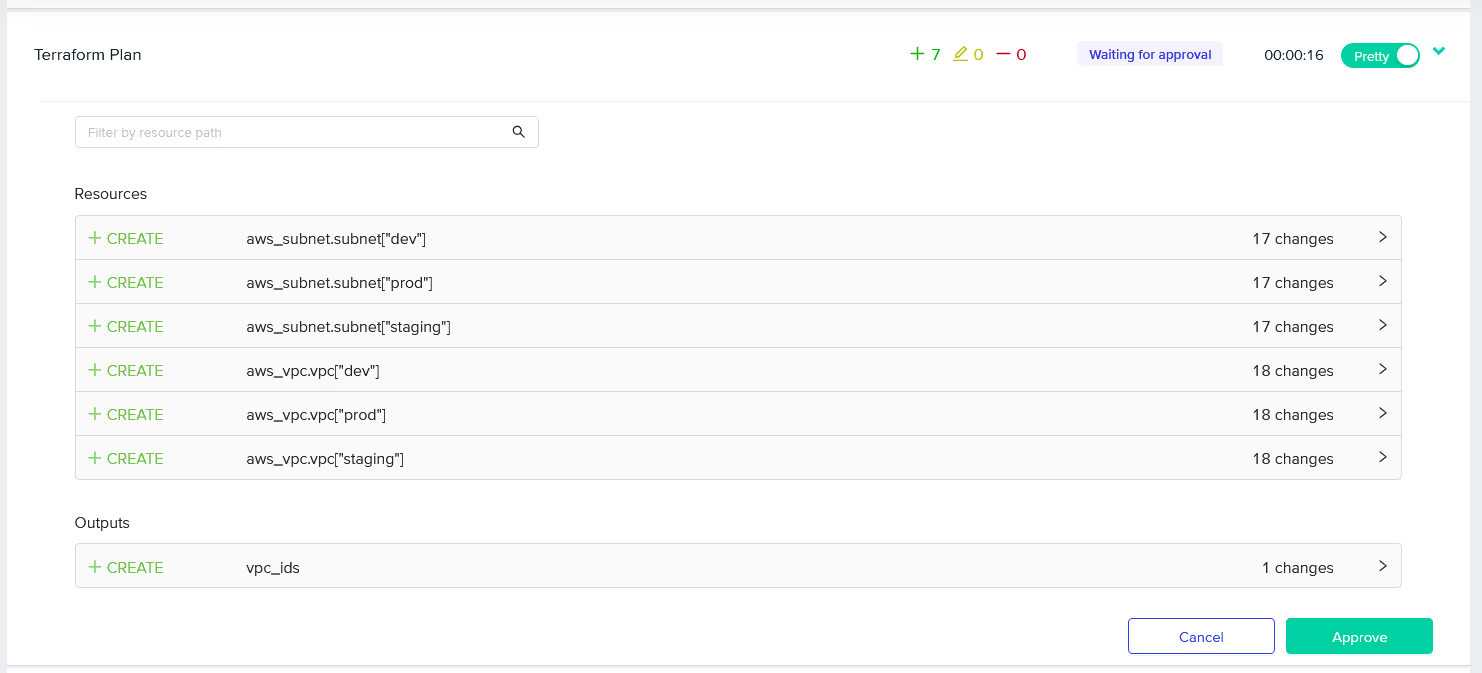
- Post-Deployment Logs: Once the deployment is finished, review the logs to verify the changes and confirm that the deployment was successful.

With env0 templates, you can create multiple environments using the same code, just like switching between workspaces in Terraform. This helps you save time without requiring you to write duplicate code.
Each environment can have its own configurations, but the main code stays the same across all environments.
Conclusion
By now, you should have a clear understanding of how Terraform workspaces help with deploying multiple environments using the same Terraform configuration with an isolated state file.
We have looked at the workspace commands to manage your environments and how to leverage env0’s environment capabilities for much more seamless management.
Frequently Asked Questions
Q. What are the difference between Terraform workspaces and modules?
Terraform workspaces work with independent state files for different environments, whereas Terraform modules provide reusable Terraform code.
Q. What happens to resources when switching workspaces?
As soon as you switch the workspace, you start to interact with the state of your selected workspace. The states and resources in other workspaces remain untouched.
Q. Can workspaces share resources?
No, you cannot share resources across Terraform workspaces since each of them has an isolated state file. For shared resources, you need to manage them outside of the workspaces or use modules.
Q. How do Terraform workspaces differ from Git branches?
Git branches help you manage version control of the Terraform code, whereas Terraform workspaces help you manage multiple environments with separate state files.


.webp)


.png)


.avif)
.png)